Instant Pot Yogurt

Instant Pot yogurt | Instant Pot recipes | Homemade yogurt recipe | Easy yogurt recipe

Are you on the Instant Pot bandwagon yet? 🙂 If you are, have you tried making yogurt in your Instant Pot?

If you haven’t, you should! Instant Pot Yogurt is great.

I’ve made homemade yogurt several different ways over the last few years, and homemade Instant Pot yogurt is hands-down my favorite method. There’s very little babysitting involved, and the Instant Pot does a great job of maintaining the temperature for 24 hours, which is something I need since I make 24 hour lactose-free yogurt.

If you don’t own an Instant Pot, you should look into getting one. It’s a programmable electric pressure cooker that also works as a rice cooker, slow cooker, yogurt maker and a few other things.

You can make amazing, quick meals in the Instant Pot, although I mostly love it for making things like rice, beans and chicken broth. Because of the pressure cooking function, cooking all of these foods in my Instant Pot is WAY faster than doing it on the stovetop.

I own this Instant Pot.

Why Make Your Own Yogurt?

Anyway, back to yogurt. You may be wondering why it’s worth it to make your own yogurt.

Personally I have a few different reasons.

For one, I can make lactose-free yogurt by culturing my yogurt for 24 hours. I’m lactose intolerant, and can’t eat most commercial yogurt because it’s not cultured for long enough to get rid of all the lactose.

Secondly, I like that I have total control over the type of milk that I use. I like to make my yogurt with organic, grass-fed, whole milk. That type of yogurt is pretty rare in grocery stores.

(Throw in the fact that it has to be lactose-free and I’m not sure it even exists.)

You may have a different preference for your yogurt, which is fine because you get to choose whatever milk you want to use.

Finally, making your own yogurt usually saves you a significant amount of money over buying commercial yogurt.

Choosing a Yogurt Starter

Homemade yogurt requires a yogurt starter, a blend of bacteria that you add to your milk during the culturing period.

You have two main options for yogurt starters: a commercial powdered starter or a small amount of pre-made yogurt, either from storebought yogurt or from a previous batch of homemade yogurt.

I like to use this powdered starter for my Instant Pot yogurt.

For me, this is mostly due to convenience. I don’t regularly buy storebought yogurt, and in order to use your own yogurt as a starter for the next batch, you need to be making a new batch of yogurt about every week.

In this season of my life, I prefer not to be saddled by any more responsibility than I already have. 🙂 Instead, I make a big batch of yogurt and then just make another batch when we run out, which is usually more like once every three or four weeks.

If you prefer to use a small amount of yogurt as your starter, you can use any type of commercial yogurt that contains live and active cultures.

If you’re committed to trying to use your own homemade yogurt as a starter for each new batch, I’d recommend seeking out a special type of heirloom or reusable yogurt to use as a starter. These yogurts can be used to start new batches indefinitely, as long as you’re consistently making new yogurt every week.

For this type of yogurt, I’d recommend purchasing this starter culture from Cultures for Health. I’ve never bought yogurt starter from them before, but I’ve been happy with their milk kefir and water kefir grains and I’m sure they do a great job with yogurt, too.

How to Make Instant Pot Yogurt

Recipe Notes

In addition to your Instant Pot, the other required piece of equipment you need is a thermometer, to ensure that you’re adding the yogurt starter at the correct temperature. I use this basic thermometer.

I like to make a gallon of yogurt at a time. If you don’t want to make this much, you could easily halve the recipe to make only a half gallon. All of the steps will be the same, although it will take less time for your milk to boil and then cool off.

I prefer to use grass-fed whole milk for my yogurt because this type of milk is the most nutrient-dense. You, however, can use whatever type of milk you prefer.

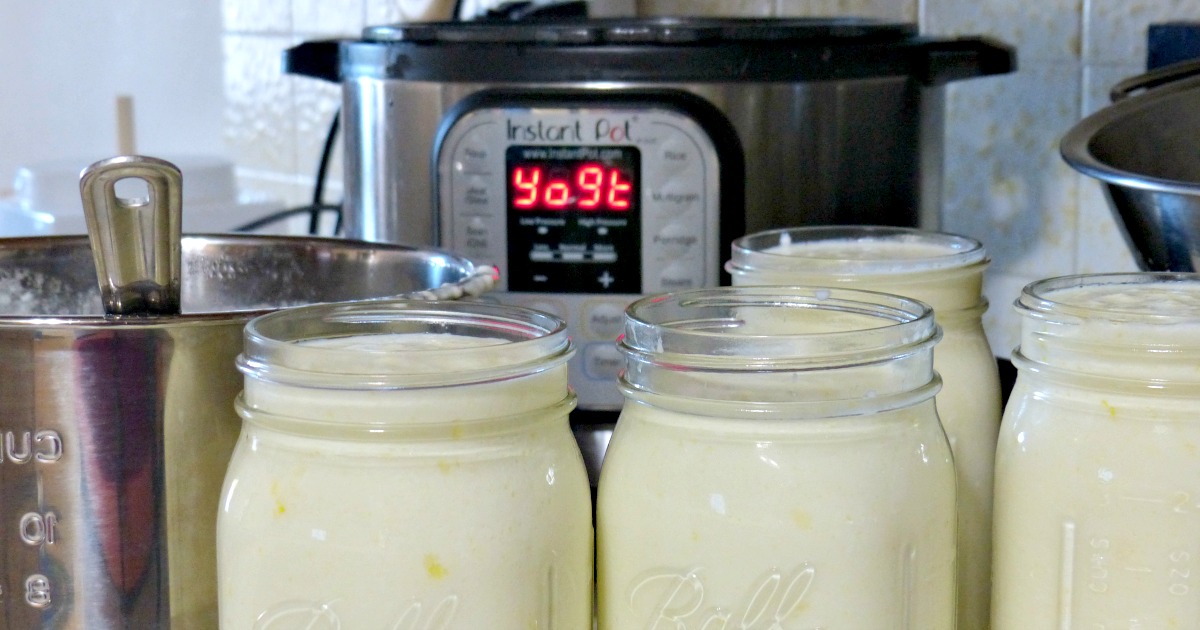
You will need some containers to store your yogurt in after it’s finished culturing. I like using wide mouth quart jars. Four of them are perfect for storing a gallon of yogurt.

Instant Pot Yogurt
Save RecipeSave Recipe
Recipe Image

Ingredients

  • 1 gallon of milk (I like to use whole, grass-fed milk, but you can use whatever milk you prefer)
  • Yogurt starter, either powdered starter (I use this one) or 1/4 cup storebought or homemade yogurt from previous batch

Instructions

  1. First you need to sterilize your Instant Pot. Add 1-2 cups of water to your Instant Pot. Turn the steam release handle to sealed, hit the steam button and set the time for 1 minute.
  2. Your Instant Pot will take a few minutes to come to pressure and then will steam the water for one minute. Once it beeps at you that it's done, do a quick release to release the pressure. After the steam has stopped releasing, open the lid and dump out the water.
  3. Add your gallon of milk to the Instant Pot. Turn the steam release handle to sealed. Hit the yogurt button and push the adjust button until the displays says "boil."
  4. The Instant Pot will now boil your milk. This usually takes about 45 minutes for me, but may take a little longer or shorter for you.
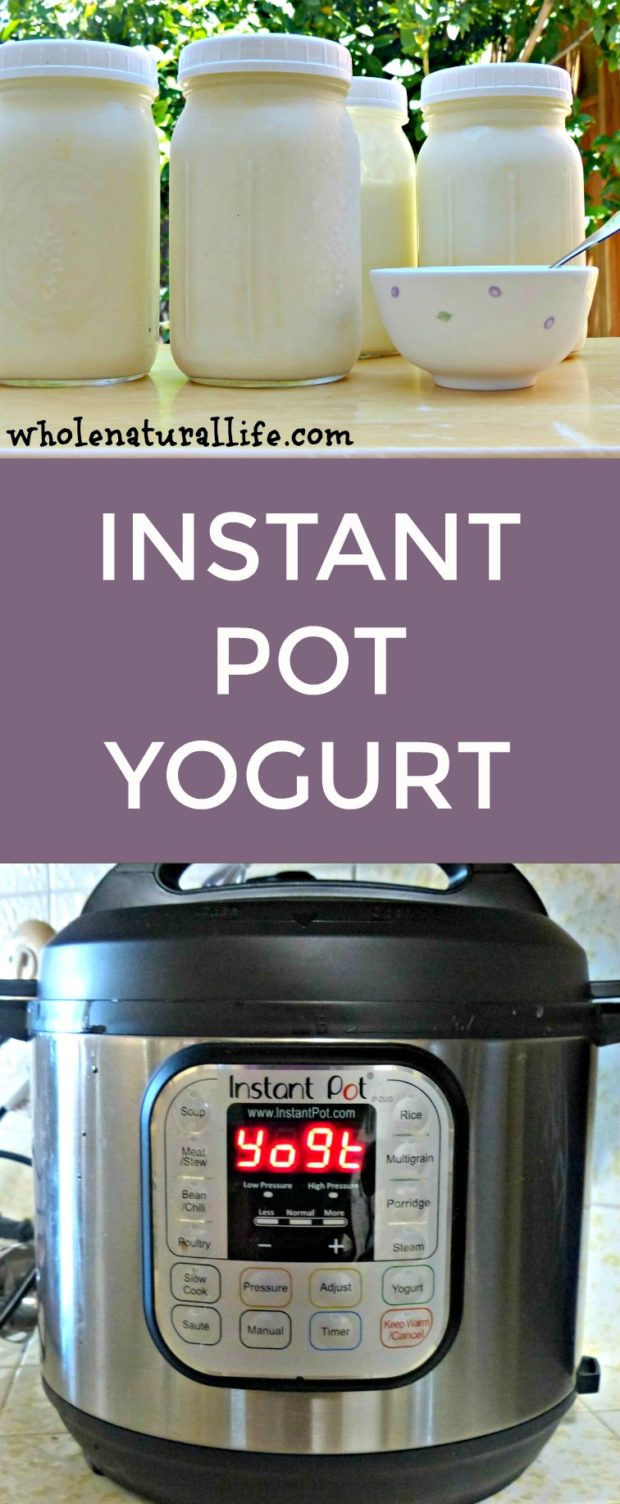
  5. After the milk has boiled, your Instant Pot will beep and the display will read “yogt.”
  6. You now need to cool your milk down to 110 degrees. In my opinion, this is the only semi-annoying part of the process. Take the lid off your Instant Pot and remove the pot to somewhere on your counter. Stick a liquid thermometer into the pot so you can keep an eye on the temperature. (I use this simple thermometer.)
  7. To speed up the cooling process, you can wrap some ice packs around the pot and periodically stir your milk. Cooling the milk usually takes a couple hours for me, but it may take longer or shorter for you.
  8. Once your milk has cooled to about 110 degrees, add your yogurt starter. (If you're using a powdered starter (I use this one), follow quantity directions on the box.) Stirring continuously, slowly add your yogurt starter to your milk. Make sure that the starter is thoroughly and evenly mixed throughout the milk.
  9. Return your pot to the Instant Pot and put the lid back on. Hit the yogurt button again and then hit the adjust button until it displays a number. This is the number of hours that your yogurt will culture. You can use the “+” and “-” buttons to adjust how long you want your yogurt to culture. Jesse and I are both lactose intolerant, so I ferment my yogurt for 24 hours in order to make a lactose-free yogurt. If you do not have lactose issues, you can ferment your yogurt for a shorter amount of time. I'd suggest starting with 8 hours and then experimenting with longer times if you desire.
  10. After you’ve selected the number of hours, your Instant Pot will beep and then display 0:00. It will then start counting up as it cultures.
  11. When your yogurt is done culturing, the Instant Pot will beep a final time and then display “yogt.” You can now transfer your yogurt to your preferred storage containers. I like to put my gallon of yogurt into four wide mouth quart jars.
  12. Store finished yogurt in the fridge. It should keep for several weeks.
7.8.1.1
49
https://wholenaturallife.com/instant-pot-yogurt/

Looking for More Fermented Foods Recipes?

Be sure to check out my posts on how to make milk kefir, how to make water kefir, and how to make kombucha.

If you’re already a kombucha lover, you’ll also enjoy my recipes for strawberry kombucha, raspberry kombucha, and strawberry lemon kombucha!

———————————————————————————————————

STANDARD FTC DISCLOSURE: In order for me to support my blogging activities, I may receive monetary compensation or other types of remuneration for my endorsement, recommendation, testimonial and/or link to any products or services from this blog. Please note, I only ever endorse products that are in alignment with Whole Natural Life’s ideals and I believe would be of value to my readers. Please also note that Whole Natural Life is a participant in the Amazon Services LLC Associates Program, an affiliate advertising program designed to provide a means for sites to earn advertising fees by advertising and linking to amazon.com.

75 Responses to Instant Pot Yogurt

  1. Christina says:
    I really would like to try making yogurt in my instant pot but do not have the yogurt feature on mine. Can I manually put in the time and settings?
    • Hi Christina, I don't know! The yogurt feature does NOT use pressure cooking, so I'm not sure how you would do it manually. You could try googling to see if anyone else has solved this problem. Good luck!
  2. Kelly says:
    On step 4, should the vent be set to sealing or venting?
  3. Erica says:
    Do you strain your yogurt? I'm curious to know what the consistency is, when I tried to make yogurt in my instapot I had to strain it in bags and it kind of creeped me out. When I make it on the stove top and pour it into jars (with all the correct temperatures and such) there is an evaporation that takes place because I'm stirring it for about 15 minutes. I just leave it in the jars in a cooler with the water at 110 degrees all night and it's thick and amazing. There is no evaporation in an instapot though so if your yogurt is not runny it must mean the culture is working really well.
    • Hi Erica, I don't strain my yogurt. My daughter and I really like the consistency, but it's probably on the runnier side if you're used to Greek yogurt and the like. I wouldn't describe it as runny, though. I think it just depends on your preference--it's all relative! :) I've read that boiling it an extra time or two at the beginning can make it even thicker; you might try that.
  4. Joi says:
    Hi Meghan, this is such an easy recipe. I am going to try it in my instant pot today. Thanks
  5. Vonni says:
    Do the quart jars have to be sterilized before the yogurt is added?
    • I do not sterilize my quart jars, although I do always wash them in the dishwasher (which maybe gets them extra clean?). As long as they're very clean before you put the yogurt in them, I personally don't think it's necessary to sterilize them.
  6. Ruth says:
    Meghan, this is my new best friend site! I love your information. I'm going to try yogurt and kefir for the first time!! I usually purchase coconut kefir. Can you tell me how to do that?????
    • Aww, thanks, Ruth! That's so nice to hear. Are you saying that you want to make your own coconut kefir? And is that coconut milk kefir? I haven't written about that, but here's a site with some info: https://wellnessmama.com/54711/coconut-milk-kefir-recipe/ Do you normally drink coconut milk kefir because you're dairy-free? If so, coconut milk kefir may not be the best option for you, as you need to frequently return the grains to dairy milk in order to keep them alive. I know that you can also make your own coconut yogurt, but I haven't tried it myself. If you google you should be able to find some good recipes.
  7. Ruth says:
    I am not lactose intolerant. I just love coconut products. I am going to give it a try - both for the Kefir and the yogurt. The Kefir label actually says "Coconut cream" so I'll be experimenting. Thanks for the encouragement and the website. I will check it out.
    • Great! I hope it works well for you!
    • Sandra Bourgeois says:
      can you let me know how this goes? I'm especially interested in making coconut yogurt. My friend makes it NOT in an insta pot and it's delicious! She uses a live culture from a coconut yogurt she gets at an asian store. my email is mrsbpianoclass@mac.com. Thanks!
  8. Kristin Brisson Scott says:
    Quick question- can I add vanilla and raw honey in the beginning so it's not just plain? Do you ever make it other than plain? Thanks!
    • Yes, but you can vanilla and honey, but NOT in the beginning. Adding those at the beginning could affect the fermentation. I'd add them at the end--either just to each bowl when you eat it, or when you ladle the finished yogurt into your jars. Hope that helps!
  9. Terry says:
    I just made it following this recipe and it is runny like a heavy milk. Will it thicken in the fridge? I used a gallon of organic milk. 3 packages of yogurt starter. and 8 hour setting. The only thing is the steamer ended on venting. I thought it was sealed. Would it flip over by itself or did I mess it up?
    • Hi Terry, What kind of yogurt starter did you use? When I use the Yogourmet (which I linked to in the post), it takes four packets to make a gallon of yogurt. Each packet is good for fermenting four cups of milk. Did you use Yogourmet, or something else? If it was something else, are you sure you used the correct amount of starter?
  10. Denise Hughes says:
    I speed up the cooling by putting the pot into the kitchen sink filled with a couple inches of cold water. Usually cooled in about 20 minutes!
    • That's a great tip, Denise! Thanks for sharing. I've been scared to do this because I worried the temperature change could warp my pot. I guess not. :)
      • Larraine says:
        I've made it twice and both times I put the pot in the sink with cold water and added ice cubes. Make dude uou don't get water in your pot.
  11. Coon says:
    I made it with coconut milk carton and it's super runny, any idea how to thicken it?
  12. Lavada Kraft says:
    Have you ever used almond or rice milk? If so whic j kind is best?
    • I have never used almond or rice milk. You probably could, but you'd have to find a recipe specifically made for those milks.
      • Jill says:
        I tried making it for the first time and used almond milk... It did not work using this recipe. (I knew it was a possibility but figured I would try it...)
  13. Dianne says:
    I have been making my yoghurt in the Instapot for ages, but I do the heating of milk on the stove top, I add half a cup of full cream milk powder while hot as we love rich super creamy yoghurt & mix well, cool down to add my starter (I use granules from either online or our local brew shop) & then pour into mason jars and seal. I stand them in the Instapot (no added water, just sit inside) and set as directed for 12-14 hours. Presto yoghurt set beautifully, creamy and tart tasting in jars with no messing about. The Instapot booklet has clear temperature instructions, but I elected to do jars rather than transferring the 'done' yoghurt. Have not had a failure yet! By far the nicest yoghurt we have tried. A word of warning, check the height of your jars in the pot before selecting, the lid needs to fit on the Instapot (remove the underside lid vent filter for more space). I also measure my milk out in my jars before heating, takes the guess work out of the amount of milk to use. I have also done it the exact same prep way but cultured in a cooler with hot water wrapped in a blanket for 12 hours. This works, but it needs a few extra days in the fridge to really thicken up.
  14. judy spedale says:
    Thanks for posting -I am following the Specific Carbohydrate Diet and the yogurt must be fermented at temp between 100-110F for 24 hours. Would you know the fermenting temp for making yogurt in the Instant Pot?
    • I'm not sure what the fermenting temperature is. For what it's worth, though, I am very sensitive to lactose and this yogurt causes no issues for me. I think it's made in an SCD-compliant way that removes all the lactose.
  15. Anne Kozal says:
    Hi Meghan, In Step 9 when you culture the yogurt for 24 hours, do you turn the steam release handle to Sealing or Venting? Above you mentioned that the yogurt setting does NOT use pressure cooking. However, on the Quick Reference Guide that came with my Instant Pot (which seems to be the same one as your picture), it mentions to use Steam Release Sealing when using the Yogurt feature. Can you please clarify what you do?
  16. Crycket says:
    could I possibly put my yogurt into glass jars into my IP? This is the only feature right now keeping me hooked on my yogurt maker
    • Yes, you can do that! I haven't tried it personally but I'm sure you can find directions online. I think you can't make a full gallon, which is why I haven't tried it.
  17. Terry says:
    I made yoga re like the video ( sorry it was a different video ),'i used he organic plain yogurt, but it never thickened? What did I do wrong? I so hot that I followed the recipe to a T ?
    • Hmm. I'm not sure. I've never had this recipe fail for me. How much yogurt did you use as your starter? Did it still not thicken up even after putting it in the fridge? My yogurt usually seems pretty thin when it first finishes, but then it thickens up a lot after a day or two in the fridge.
      • Erin says:
        I'm happy having the same issue. I am putting mine in the fridge to see how it responds but otherwise idk what I did wrong.
        • I'm not sure what's going on. I've made this recipe dozens of times and it always turns out great for me. Have you tried using different types of yogurts (or powdered starters) for your starter? It could be that the yogurt culture you're using just makes a thinner yogurt.
  18. Jan Lewis says:
    So disappointed. :( I used the same starter (2 packets) and 1/2 gallon (store brand) whole milk. Followed the settings to the T (24 hours) and it came out super runny. I tried straining in a nut milk bag, but it ran right through. I've put it in glass jars in the fridge, but it's so runny I don't have high hopes. I may have to sweeten it and drink it so it won't go to waste. Any ideas??
    • Jan Lewis says:
      Me again...think I may have figured it out? I saw on a FB IP community that someone asked about her fermenting being on low instead of medium. I had noticed it on low, but not having done this and the recipe not saying so didn't think much about it. I'm assuming it didn't get warm enough to ferment properly. I'm maybe wrong, but I'll try again with it on medium and see what happens.
    • My yogurt often gets a lot thicker after chilling in the fridge overnight. If you're expecting Greek yogurt, it's never going to be that thick, but I definitely wouldn't describe it as runny.
  19. Lisa says:
    Regarding yogurt starter: I bought yogurt at the store for my first round of home made yogurt. I used a couple of tablespoons then froze the rest in tablespoon sized globs. Every third or fourth time I make yogurt I freeze a few blobs to use in future yogurt. The blobs just need to be thawed and tempered and they are good to go.
  20. Jill says:
    This looks amazing and I cannot wait to try it. I have 2 questions- 1) If I use chocolate milk will it work and make chocolate yogurt? 2) Will this recipe work with almond milk? Vanilla almond milk? Thanks!
  21. Cory says:
    Thank you so much for this recipe. I do have a question. During the culturing process, does it matter if the setting is set to "less" or "normal"? What's the difference?
    • I'm not sure what you're referring to with "less" or "normal." On my Instant Pot, I only have to select how many hours I want the yogurt to culture for. Can you elaborate?
      • Brooke Dempsey says:
        The other recipes I have seen and the instructions on Instapot say to use normal for yogurt and less for sweet rice. I have the same problem... waited 8 hours and nothing happened lol.
  22. Lyndsey says:
    Lols so good and so easy! How do I make it flavored? My kids love strawberry, banana, and vanilla. I’m guessing at the end?
    • I've never actually flavored it, but if you want to then I would definitely do it at the end and not sooner. We just add frozen berries and any other toppings to our bowls right before eating.
  23. Melissa says:
    Hi I made this yesterday. It was the consistency of a really thick milk. I put it in the fridge overnight and it didn't thicken at all. It tastes wonderful but is too soupy to eat as a yogurt! I used half a cup of stoneyfield organic whole milk yogurt as my starter. What did I do wrong and can I save it? Maybe by straining? This is my first time trying yogurt so not sure what to do!
    • Melissa, you can definitely make it thicker by straining it. As to what went wrong, I'm not sure. You may need to play around with the type of starter you're using. Some types of bacteria are more prone to making a thicker yogurt. Also, if you're used to Greek yogurt, just know that this isn't ever going to be that. But my family happily eats it out of bowls all the time, so I definitely wouldn't describe it as too soupy. :)
  24. Angel Peng says:
    So my question is do u set it machine to 24 hour till it set yogurt mode?also will it be super tangy
  25. […] http://wholenaturallife.com/instant-pot-yogurt/ […]
  26. […] Homemade yoghurt from wholenaturallife.com […]
  27. Karin says:
    You don't indicate how much yogurt starter is needed for 1 gallon of milk. I just ordered the three-pack that you suggested. Will that be enough for one batch, or will I be modifying the amount of milk? Thanks so much! I can't wait to try it!
    • Karin, just be sure to follow the directions on the starter. That three pack should be enough to ferment 1.5 gallons of milk. (It comes as 6 little packets, so you can easily just make a gallon at a time.)
  28. Susan says:
    Hi There! I’m looking forward to trying your recipe. Question though, you said that you ferment it for 24 hours? I too need to make lactose free yogurt but I was using lactose free milk. Can you please explain how the 24hr ferment kills the lactose? Thank you!!
    • Hi Susan, The bacteria in the starter consume the lactose as part of the fermentation process. If you give them 24 hours to work, they will eat up virtually all of the lactose in the milk.
  29. Brittany says:
    What if I missed the window and cooled the milk too much after boiling it. Can instant over?
  30. Sharron Powers says:
    just wondering if I could use Almond milk with the starter?
    • I would definitely not use almond milk in this recipe. You may be able to make your own almond milk yogurt (I've never tried it), but I would go find a recipe that's specifically designed to use almond milk.
      • Sharron Powers says:
        I've since seen a few recipes using almond milk but they require other ingredients that I don't care to use. I will be trying this recipe soon. Thanks for responding.
  31. Mike Rickard says:
    Hey guys. I don't know if it's possible but it seems like I'm having problems with milk now. I don't know if it's all the junk they put in milk like hormones and antibiotics, but I can't drink milk. It's too bad because I enjoy yogurt and know it's good for you. I'm glad I found this Instapot recipe because I love cooking and didn't know you could make your own yogurt. Can't wait to see how this turns out.
  32. Neeta says:
    Hi Meghan, this is such an easy recipe. I am going to try it in my instant pot today. Thanks
  33. olivia timperman says:
    Wondering why a longer hold time renders the yogurt lactose free? Also, can this recipe be used to create Greek Yogurt?
    • The fermentation process consumes the lactose in the milk. A longer fermentation time (or hold time, as you called it), will remove more of the lactose. 24 hours will remove virtually all of the lactose. I have never tried this myself, but you should be able to strain your yogurt to make Greek yogurt.
  34. LisaN says:
    Please clarify that if you choose the default Instant Pot 24:00 setting, it is on low and will not work. I choose the 8:00 normal setting and add hours to get to 24.
  35. rochelle fitzpatrick says:
    Best yogurt EVER! Set up perfectly and you could smell the tanginess immediately after removing the lid. My ex in the early 80s was from the middle east and I've made homemade yogurt for 30 years on the stove top, cooled it down, added starter and wrapped the pot in a blanket for 24 hours and left it completely undisturbed. This has a wonderful tangy smell and I'm looking forward to digging in later this morning. Thank you!!
  36. Sandy says:
    For those asking about almond milk yogurt, I've used this recipe with my old yogurt maker, but not yet with my instant pot. It has corn starch for thickening, much better than gelatin, which is an animal product... http://afairytalecomesalive.blogspot.com/2013/04/recipe-almond-milk-yogurt.html Thanks for posting the 1-gallon instant pot directions for dairy milk. Other recipes I found were 1/2 gallon and I wanted to make sure 1-gallon was doable. It worked like a charm. I'm especially pleased to see directions indicating that it's good to leave it in the pot longer, had worried about whether I had to pay close attention to the time. Thanks again!
  37. Heather Acton says:
    So disappointed ! I followed the instructions and, like some others have written, my 24 hour yogurt is as runny as half and half. I tried putting it in a yogurt straining bag but it went right through like proper liquid. I read that I can try reheating it to 110 and then incubating again. I'm in the process of doing that and trying it in the oven even though my oven doesn't have a setting that's low enough. When I set the incubating time on the instant pot, I set it to "normal" and 24 hours. I wish I knew what the heat setting was but I don't see any way to find out. So disappointed. Any thoughts and suggestions would be welcome.
  38. A. Cook says:
    Hi Meghan, I am SOOO glad you explained why this method for making homemade Yogurt produces a lactose free result. I love Yogurt and also want to put it in my kids' smoothies. Unfortunately, we're all lactose intolerant. I was hesitant to try doing this with my IP but feel a lot more confident now given you have no problems with it. Brilliant. :) Thanks for the great tips! - Anne Cook
  39. Tina thakur says:
    Hi Meghan Slocum, First time making Yogurt turned out great. Easy to do will make again Thanks for Sharing
  40. Angie says:
    Hello-Am a bit confused- ou state making it in the Instant Pot is your favorite way but when I go to your article on dehydrator yogurt making you state that is your favorite way. Which is it as I am wanting to try dehydrating to keep my instant Pot free for cooking but have limited time for experimentation. Thanks
    • Ah, good question! The Instant Pot is my current favorite way. :) That dehydrator article was written several years ago, before I had an Instant Pot. I should go update that. I personally find the Instant Pot much easier than my old dehydrator method. Thanks for pointing that out!

Leave a reply